
Introduction
Maintaining the sharpness of dental instruments is essential for efficiency, patient safety, and instrument longevity. Whether you’re a seasoned dentist, a dental student, or someone interested in practicing dental care at home, understanding how to properly sharpen instruments like scalers, curettes, and surgical tools is vital. This guide provides an in-depth look at the sharpening process, with step-by-step instructions and professional tips that can help maintain the performance of these critical tools.
Why is Instrument Sharpness Crucial?
- Precision in Treatment: Sharp instruments allow for cleaner, more precise cutting and scaling, leading to better outcomes during procedures. A dull instrument can lead to inefficient calculus removal and inaccurate dental work.
- Improved Patient Comfort: Dull instruments require more force, leading to increased discomfort and the risk of soft tissue damage. Sharp instruments glide smoothly, minimizing pressure on the patient’s gums and teeth.
- Reduced Operator Fatigue: When using dull instruments, practitioners often need to apply more force, which can lead to hand fatigue over long procedures. Sharp tools allow dentists to work more efficiently and with less strain.
- Longevity and Durability of Instruments: Regular sharpening increases the life of the instruments by maintaining their cutting edges and preventing damage from overuse.
- Infection Control and Healing: Instruments with sharp edges minimize trauma to tissues, promoting quicker healing and reducing the likelihood of post-procedural infections.
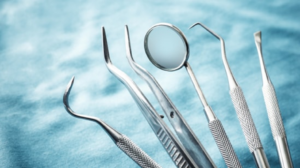
Types of Dental Instruments That Require Sharpening
- Scalers and Curettes: Scalers and Curettes are used for removing plaque and tartar, these instruments need to be sharp to ensure effective scaling.
- Chisels and Hatchets: Instruments like chisels, often used in cavity preparation, need to be maintained sharp for clean cuts and effective shaping of tooth structures.
- Surgical Instruments: Any instrument that cuts or dissects tissue, like dental scalpels and bone chisels, requires precision sharpness for smooth, safe surgeries.
When to Sharpen Dental Instruments?
Sharpening should be done before noticeable dullness becomes a problem. A simple way to determine dullness is by testing the instrument on a sharpening test stick or your fingernail:
- If the instrument slides or doesn’t catch, it’s dull and needs sharpening.
- For high-usage instruments like scalers and curettes, sharpening after every 15-20 uses is ideal to prevent the edge from becoming too worn down.

Tools You’ll Need to Sharpen Dental Instruments
- Sharpening Stone
- Arkansas Stone: Natural stone known for its fine grit, ideal for regular sharpening.
- Ceramic Stone: Requires no oil or water, designed for a smooth finish.
- Synthetic Stones: Man-made options that are highly effective for more extensive sharpening tasks.
- Sharpening Oil or Water: Depending on the stone type, lubricants such as oil or water are essential to reduce friction and wear during sharpening.
- Test Stick: Used to check the sharpness of instruments.
- Magnifying Glass: Helps in inspecting the blade edge to ensure that there is no dulling or feathering.
- Light Source: A well-lit work area ensures visibility during the sharpening process.
Step-by-Step Guide to Sharpening Dental Instruments
- Prepare Your Sharpening Station
Set up a clean, well-lit area with all the necessary tools. Ensure your sharpening stone is properly lubricated with either oil or water, depending on the type of stone you’re using. - Inspect the Instrument’s Cutting Edge
Before sharpening, examine the instrument under a magnifying glass or in a bright light. Look for nicks, dull spots, or feathered edges, which are signs the instrument is overdue for sharpening. - Determine the Correct Sharpening Angle
Each instrument has a specific angle that needs to be maintained while sharpening. For curettes and scalers, this angle is typically around 70-80 degrees.
- Gracey Curettes: 70-degree internal angle
- Universal Curettes: 80-degree internal angle
- Position the Instrument Properly
Hold the instrument in your dominant hand, with the blade positioned against the sharpening stone at the appropriate angle. Use your non-dominant hand to stabilize the stone. - Use Proper Sharpening Motion
Begin sharpening by sliding the instrument along the stone in a controlled motion. Move from the heel of the blade towards the toe (the curved tip of the blade). Ensure you maintain consistent pressure and an even stroke pattern to avoid over-sharpening one part of the instrument.
- For scalers, you can follow a firm-to-light pressure as you move along the blade’s edge.
- For curettes, the strokes should be gentler but consistent.
- Maintain the Correct Angulation Throughout
To prevent uneven sharpening, it’s essential to hold the instrument at the correct angle throughout the entire stroke. Failure to maintain the correct angulation can cause premature wear or an improper cutting edge. - Polish the Blade
After sharpening, it’s important to polish the instrument on a finishing stone to smooth out any rough or jagged edges. This step also enhances the sharpness by giving the blade a clean, polished edge. - Test the Sharpness
Test the sharpness of the instrument by running it across a test stick or your fingernail. A sharp blade will bite into the surface rather than sliding. If the instrument does not catch, repeat the sharpening process.
Common Sharpening Mistakes to Avoid
- Over-sharpening: Applying too much pressure or sharpening the instrument too frequently can reduce its lifespan by removing too much metal.
- Wrong Angle: Failing to maintain the correct angle can lead to an ineffective cutting edge or damage the instrument altogether.
- Skipping Polishing: Without a final polish, the instrument may have microscopic rough edges that hinder its performance.

Sharpening Frequency: How Often Should Instruments Be Sharpened?
- For high-use instruments like scalers and curettes, sharpening every 15-20 uses is ideal.
- Surgical instruments may require sharpening after every few surgeries or major procedures to maintain peak performance.
- Always inspect instruments for signs of dullness before each use and sharpen as necessary.
DIY Dental Enthusiasts: Can You Sharpen at Home?
While dentists and professionals have specialized tools and expertise, DIY dental enthusiasts can sharpen their instruments if they follow proper procedures. However, care should be taken to maintain precision and avoid damaging delicate instruments. Purchasing high-quality sharpening stones and regularly practicing the correct technique will ensure consistent results.
Conclusion: The Importance of Regular Maintenance
Sharpening dental instruments is not just a task for professionals but an essential maintenance step that ensures precision, patient comfort, and durability. By maintaining sharp tools, dentists and dental students can provide superior care, while DIY dental enthusiasts can safely maintain their equipment at home. Regular inspection and sharpening will prolong the lifespan of your instruments, ensuring they deliver consistent and effective performance.