
Introduction: Boost Your WooCommerce Store with CSV Uploads
Are you struggling to manage your WooCommerce store’s inventory or customer orders efficiently? WooCommerce CSV upload offers an easy way to streamline these processes, letting you upload, edit, and organize data in bulk. In 2024, more eCommerce businesses are using CSV uploads to simplify product management, order customization, and even customer interactions. This guide will walk you through the essentials of using CSV uploads effectively and show you how File Uploader for WooCommerce by Extendons takes this to the next level.
What Is a CSV Upload in WooCommerce?
A CSV (Comma-Separated Values) file is a format that stores data in plain text, making it easy to read and update large quantities of data at once. In WooCommerce, CSV uploads allow you to add or modify hundreds, or even thousands, of products, orders, or customer details in bulk. With WooCommerce’s built-in CSV import/export tool, you can handle tasks like product listing, inventory updates, and order customization effortlessly.
Why Use WooCommerce CSV Upload?
WooCommerce’s CSV upload feature can significantly improve store management in many ways, such as:
- Saving Time: Update your inventory in one go instead of editing items one by one.
- Improving Accuracy: Reduce errors from manual entry.
- Enhancing Customization: Quickly add or remove product customizations.
How to Prepare Your WooCommerce CSV File for Upload
When creating a CSV file for WooCommerce, it’s essential to ensure the data is formatted correctly. This way, you can avoid common errors and ensure your uploads go smoothly. Here are the key elements to prepare:
- Include Essential Headers: Make sure each column in your CSV file has headers. Common headers include
SKU,Name,Description,Price, andCategory. - Use Proper Data Formatting: Format data according to WooCommerce’s guidelines. For example, prices should be in numerical form without currency symbols.
- Standardize Images: When adding product images, use image URLs, ensuring they’re accessible and hosted on a secure server.
- File Encoding: Save your CSV file in UTF-8 encoding to avoid character display issues, especially for non-English text.
Step-by-Step Guide to WooCommerce CSV Upload
Here’s a quick guide to uploading your CSV file in WooCommerce:
1. Log into WooCommerce Admin
Navigate to WooCommerce > Products > Import (or Export, if you’re exporting data).
2. Choose the CSV File
Click Choose File and select the CSV file from your computer.
3. Map Columns for Accuracy
WooCommerce lets you map columns in your CSV file to ensure data aligns correctly. Check each column to ensure it matches the intended WooCommerce field.
4. Run the Import
Click Run the Importer to start the upload. WooCommerce will process the data, and you’ll see a confirmation when it’s complete.
Enhancing Customer Interaction with WooCommerce Checkout File Upload
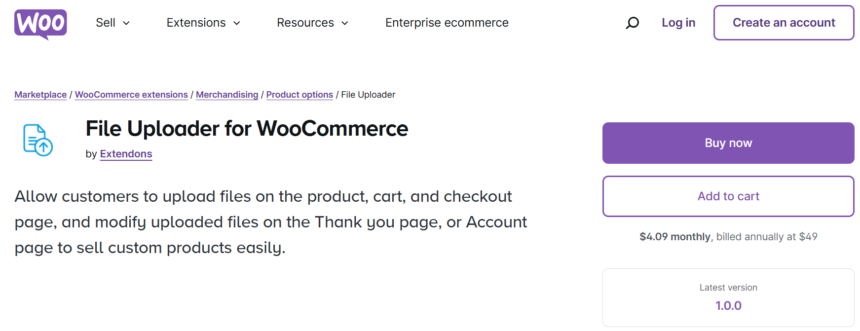
For WooCommerce stores offering customizable products, letting customers upload files can be a game-changer. This is where File Uploader for WooCommerce by Extendons comes in, providing a seamless file upload option on product, cart, and checkout pages.
Benefits of WooCommerce Checkout File Upload:
- Enhanced Personalization: Customers can upload files (e.g., logos, designs) directly with their orders, making it easy to offer tailored products.
- Improved Communication: Files and notes included during checkout help eliminate misunderstandings.
- Streamlined Order Management: All files are accessible on the order page, simplifying fulfillment.
Key Features of File Uploader for WooCommerce by Extendons
Extendons offers powerful features to make the file upload experience smooth and efficient:
- File Upload Buttons on Multiple Pages: Allow file uploads on product, cart, and checkout pages for a seamless experience.
- Custom File Rules: Restrict file types, sizes, and extensions to ensure only compatible files are uploaded.
- Approval Options: Admins can review and approve or disapprove uploaded files, with automatic notifications sent to customers.
- Edit Post-Order: Customers can modify their files on the Thank You or My Account pages, ideal for last-minute adjustments.
Optimizing the WooCommerce CSV Upload Process
Using WooCommerce CSV upload effectively requires a few key strategies:
1. Set Up Backup Procedures
Always back up your data before uploading a CSV file. This ensures you can restore previous data if there’s an error.
2. Keep CSV Files Organized
Use a consistent naming system and save older versions in case you need to reference previous uploads.
3. Check Data Accuracy
Double-check that your data is accurate to avoid issues like incorrect pricing or product details.
4. Update Regularly
Make regular updates with CSV files, especially if your inventory, pricing, or product descriptions change frequently.
Advanced Tips for Using File Uploader for WooCommerce by Extendons
The File Uploader for WooCommerce by Extendons plugin is packed with advanced features that make it invaluable for customizable product stores. Here’s how to maximize its potential:
Enable Preview and Delete Options
Customers can preview or delete uploaded files, ensuring they’re submitting the right file. This feature is especially useful for complex orders, reducing the need for follow-up.
Add a Note Requirement
To improve clarity, you can make notes mandatory for each file upload. This feature helps gather more detailed customer instructions, reducing errors and increasing satisfaction.
Set Upload Charges
File Uploader for WooCommerce allows you to set a price for each upload. This feature is handy for stores offering premium customization, enabling you to charge for design adjustments or special file handling.
Common Challenges and Solutions in WooCommerce CSV Uploads
While WooCommerce CSV upload is efficient, there are some common issues users face:
1. Encoding Issues
If your CSV file displays strange characters, it’s likely an encoding problem. Ensure your file is saved in UTF-8 format.
2. File Size Limitations
Large CSV files can sometimes fail to upload. Split the file into smaller sections or increase the upload size limit in your server settings.
3. Mapping Errors
Columns not mapping correctly can result in data issues. Use WooCommerce’s mapping tool carefully and double-check your headers.
Also, check out the useful insight about the WooCommerce Mini Cart Plugin to enhance your store’s shopping experience!
FAQs About WooCommerce CSV Uploads and File Upload Plugin
1. How do I update WooCommerce products with CSV uploads?
- Navigate to WooCommerce > Products > Import, select your CSV, and follow the prompts to map columns and update product details.
2. Can customers upload files on the checkout page?
- Yes, with File Uploader for WooCommerce by Extendons, customers can upload files on the checkout page, improving the customization experience.
3. Can I restrict file uploads to specific products?
- Absolutely. File Uploader by Extendons allows you to restrict uploads to certain products, categories, or user roles.
4. What file types are supported for customer uploads?
- File types are customizable. You can allow or restrict specific formats (e.g., JPEG, PNG, PDF) based on your store’s requirements.
Conclusion: Unlock Efficiency and Personalization in WooCommerce with CSV and File Uploads
The combination of WooCommerce CSV upload and WooCommerce checkout file upload features opens a world of possibilities for eCommerce stores in 2024. With CSV uploads, store managers can streamline inventory and order management, while File Uploader for WooCommerce by Extendons empowers customers to personalize their orders seamlessly. Embrace these tools to enhance your store’s efficiency, improve customer satisfaction, and make your WooCommerce store a standout in a competitive eCommerce market.
By using File Uploader for WooCommerce by Extendons, you’re not only optimizing your product management process but also creating a more engaging, user-friendly experience for your customers. So why wait? Make the switch to smarter, more personalized WooCommerce operations today.
